
Create a windows service application in the .NET and use the service as a background job in windows?
In Windows, a service is a program that runs in the background and performs tasks without user interaction. Windows services are similar to Unix cron jobs, which execute tasks at specified times or intervals. Creating a Windows service application is a great way to automate tasks on a Windows machine. In this blog post, we’ll walk you through the process of creating a Windows service application and using it as a cron job in Windows Services.
Create a windows service project:
Step 1: Create a New Windows Service Project
To create a new Windows service project in Visual Studio, follow these steps:
- Open Visual Studio.
- Click on “File” and select “New” > “Project.”
- Select “Visual C#” > “Windows Desktop” > “Windows Service” and give your project a name.
- Click “OK” to create the project.
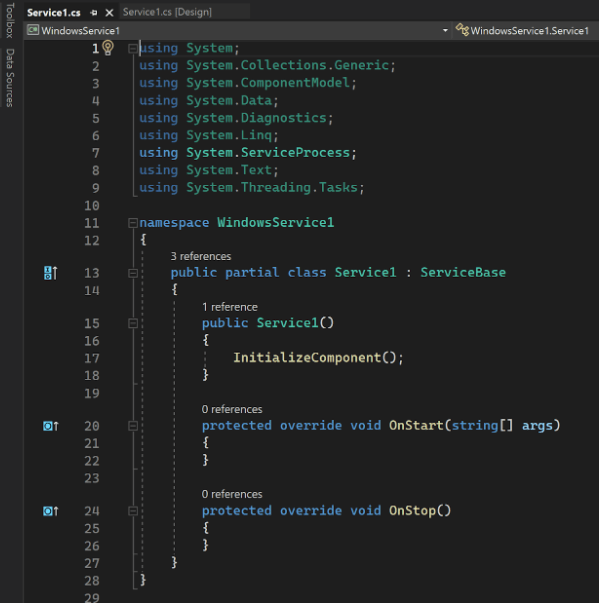
Step 2: Define Your Service
In the Service1.cs file that was created for you, you will find a class named “Service1” that inherits from the “ServiceBase” class. This class defines the basic structure of a Windows service.
In this class, you can add any code you want to run when the service is started or stopped. For example, you might want to perform a backup of your files, update a database, or check for updates to your application.
Here’s a basic example of what your Service1 class might look like:
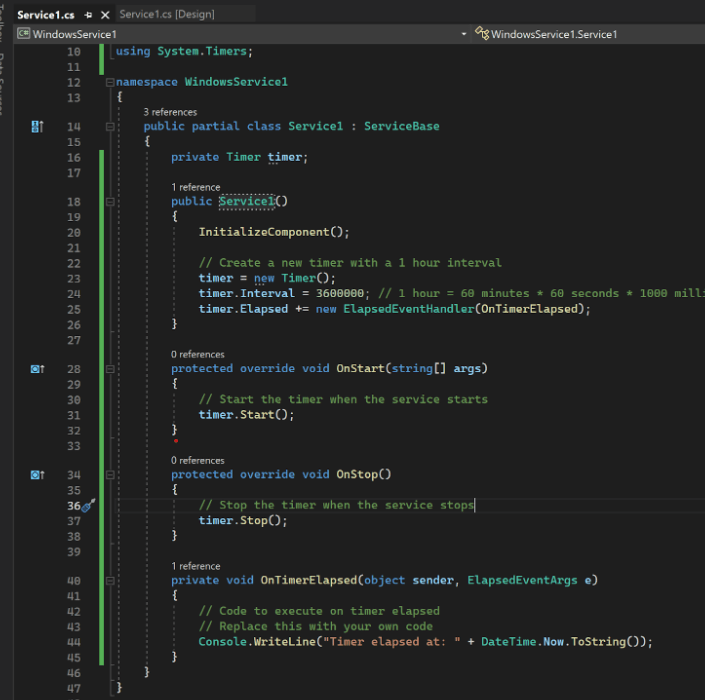
If you want your service to run periodically, then you can use the System.Timers.Timer class as shown in the code below and specify the interval:
Install your service:
To install your service, you’ll need to use the command prompt. Follow these steps:
- Open the command prompt as an administrator.
- Navigate to the directory where your project’s executable file is located.
- Type “sc create [service name] binPath= [executable path]” and press Enter.
- Replace “[service name]” with the name you want to give your service.
- Replace “[executable path]” with the full path to the executable file for your service, including the .exe extension.
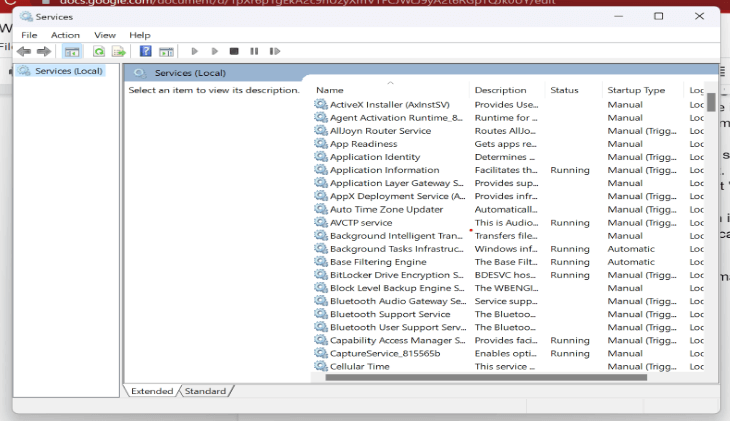
After installing the service, you can manage it using the services.msc utility tool in windows by following these steps:
- Open the Start menu and type “services” in the search bar.
- Click on “Services” in the search results to open the Services.msc console.
- Scroll down or use the search bar to find your service in the list of services. The name of your service will be the same as the name you gave it in the “sc create” command when you installed the service.
- Once you have located your service, you can see its status (running or stopped) and other details in the columns to the right.
- To start or stop the service, right-click on it and select “Start” or “Stop” from the context menu.
- To change the properties of the service, right-click on it and select “Properties” from the context menu. From here, you can configure the startup type, recovery options, and other settings.
That’s it! By following these steps, you can easily find and manage your Windows Services in the Services.msc console in Windows.
If you need to prove your skills in the .NET framework, get .NET certified on StudySection. StudySection provides .NET Certification Exam for beginners as well as experts in the .NET framework. This .NET certification can improve your resume’s success rate.


