
Load Testing: Load testing is a software testing technique to test the behaviour of the website/application under different load conditions. It is a type of performance testing which determines software performance by simulating under real-life loads conditions. This type of testing is typically performed when a software development project is near to complete. Load testing is intended to test the website/application by constantly and steadily increasing the load on the application until it reaches the threshold limit.
Requirements for Load testing:
- Java
- Eclipse: To create a selenium project.
- Selenium jar(https://www.seleniumhq.org/download/), Chrome Browser jar(https://sites.google.com/a/chromium.org/chromedriver/), and JUnit jar(http://www.java2s.com/Code/Jar/j/Downloadjunit4431jar.htm) file.
- Jmeter: To perform load testing of the selenium script.
Steps to Perform Load Testing using Selenium with Jmeter:
- Create a new project using the selenium in the “Eclipse”.
- Add required jar files in the project.
- Create a new class and write a script using the JUnit annotation.
Code:
package LoadTesting;
import org.junit.After;
import org.junit.Before;
import org.junit.Test;
import org.openqa.selenium.WebDriver;
import org.openqa.selenium.chrome.ChromeDriver;

public class LoadTest
{
   static WebDriver driver;

   @Before
   public void before()
   {
                        System.setProperty("webdriver.chrome.driver","C:/chromedriver.exe");
			driver = new ChromeDriver();
			driver.manage().window().maximize();
			driver.manage().deleteAllCookies();
			System.out.println("Open the browser");
   }


   @Test
   public void test()
   {
	  		System.out.println("Navigate to the URL");
			driver.get("https://webnersolutions.com/");
   }

   @After
   public void after()
   {
			System.out.println("Close the browser");
			driver.close();
   }
}
In this example, we are navigated to the website (https://webnersolutions.com/)URL.
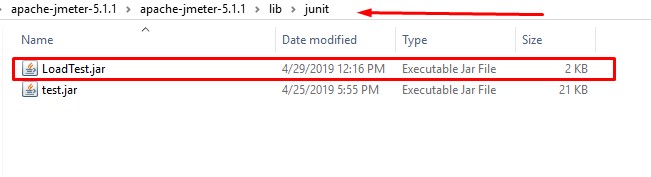
4. Export script class into the JAR file and save jar file into the system:
5. Move the script jar file into the JMeter library folder location:
“C:\Users\Downloads\apache-jmeter-5.1.1\apache-jmeter-5.1.1\lib\junit”
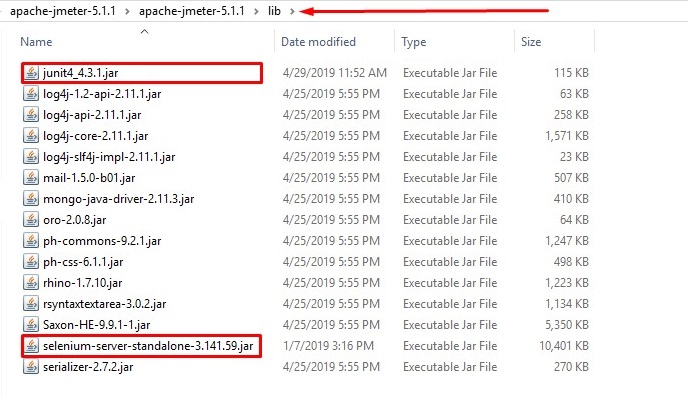
6. Add JUnit and Selenium extracted jar file with Jmeter library folder.
“C:\Users\Downloads\apache-jmeter-5.1.1\apache-jmeter-5.1.1\lib”
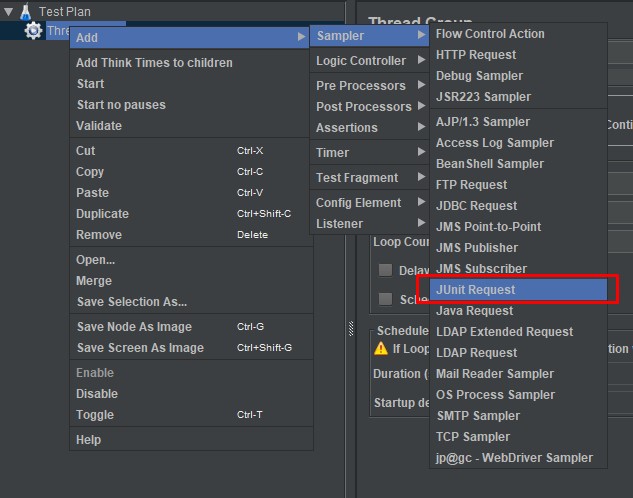
7. Now launch JMeter and create a Thread Group for performing load testing.
a. Add a new “Test Plan”.
b.Create a new “Thread Group(Thread Groups is a collection of Threads. Each thread represents one user using the application )”.
Add >> Threads >> Thread Group.
c. Add JUnit Request from “Sampler”.
Add >> Sampler >> JUnit Request.
d. Click on the “Search for JUnit 4 annotation” then check the “ClassName and Test Method”. It will fetch your created jar file and displayed in the ClassName.
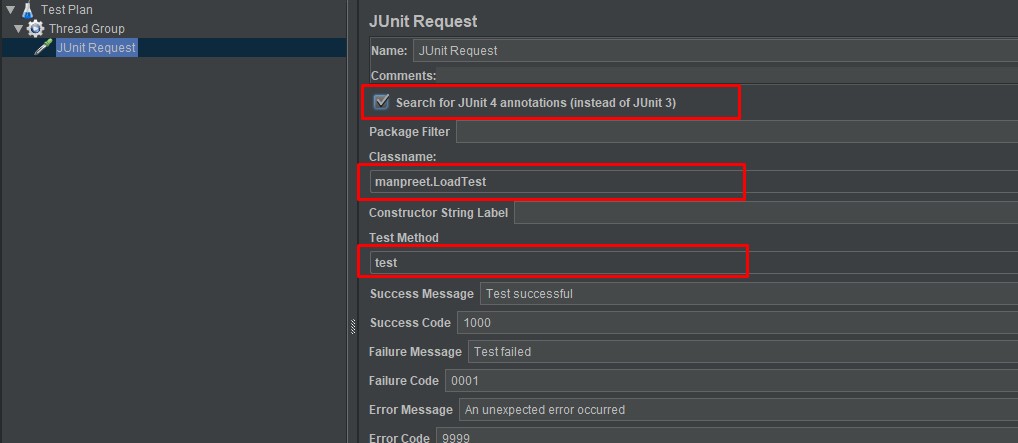
e. Add any listener to check the result in the Group.
Add >> Listener >> View Result Tree.
Now Run the script and check the result:
I am running my script with Number of Threads(User): 5
And Ramp up period(in seconds):30
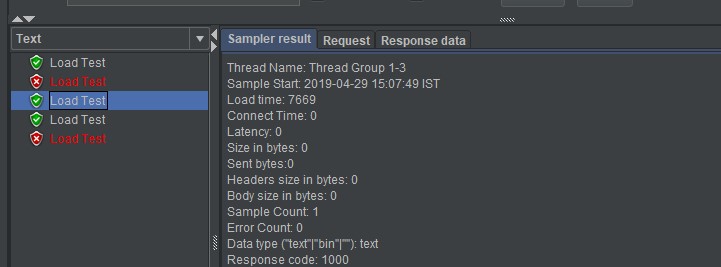
We can check the result two times script is failed out of 5 times.


